
Acoustic treatment of your studio is an incredibly important part of any aspect of music production, whether that be recording, mixing or mastering. And yet it often remains one of the most misunderstood and neglected.
In this guide, we’ll walk you through the ins and outs of acoustic treatment: what it is, how to go about doing it, and where room correction figures into the equation. We’ll also outline why acoustic treatment is so important.
What is acoustic treatment?
Put simply, acoustic treatment is the process of changing your studio environment from a muddy and reverberant space into one where the sound is balanced, predictable, and suited towards your music-making and production goals, whatever those may be.
Acoustic treatment takes into account things like room shape, size, and other aspects of the environment with the ultimate goal of reducing unwanted sonic behavior. When sound leaves your speakers, it bounces around the room, interacting with the physical space in myriad ways. These interactions can cause reverb, echoes, and buildup of frequencies that can make it difficult to hear the music properly. By treating the physical environment, you tame the undesirable sounds.
Acoustic treatment usually takes two forms: soundproofing and sound treatment. With soundproofing, the goal is to stop sound either entering or leaving the room. This guide will focus on the treatment side, that of changing the characteristics of the sound.
Do you need acoustic treatment?
Anyone working with sound can benefit from some amount of acoustic treatment. You naturally want accuracy in your music production, with what you record and mix translating to what the listener hears. If there’s a build up of bass frequencies in your room, you’re likely to reduce bass by that amount based on what you’re hearing, even though there may not be an issue with those frequencies in the song itself.
While the most obvious application for treatment is in mixing and mastering, it’s also important for recording. You want to capture a vocal or acoustic instrument performance cleanly and without the ugly sound of the room.
“I’ve seen so many producers (who’ve used acoustic treatment), and it has done more for them than any mixing course or plugin they’ve bought,” says mixing engineer and plugin developer Michael Wynne on why treatment is important. “It’s so effective for people.”
Types of acoustic treatment
Broadly speaking, there are two main types of treatment, absorbers and diffusers. Each solves a different problem. Let’s look at these in turn.
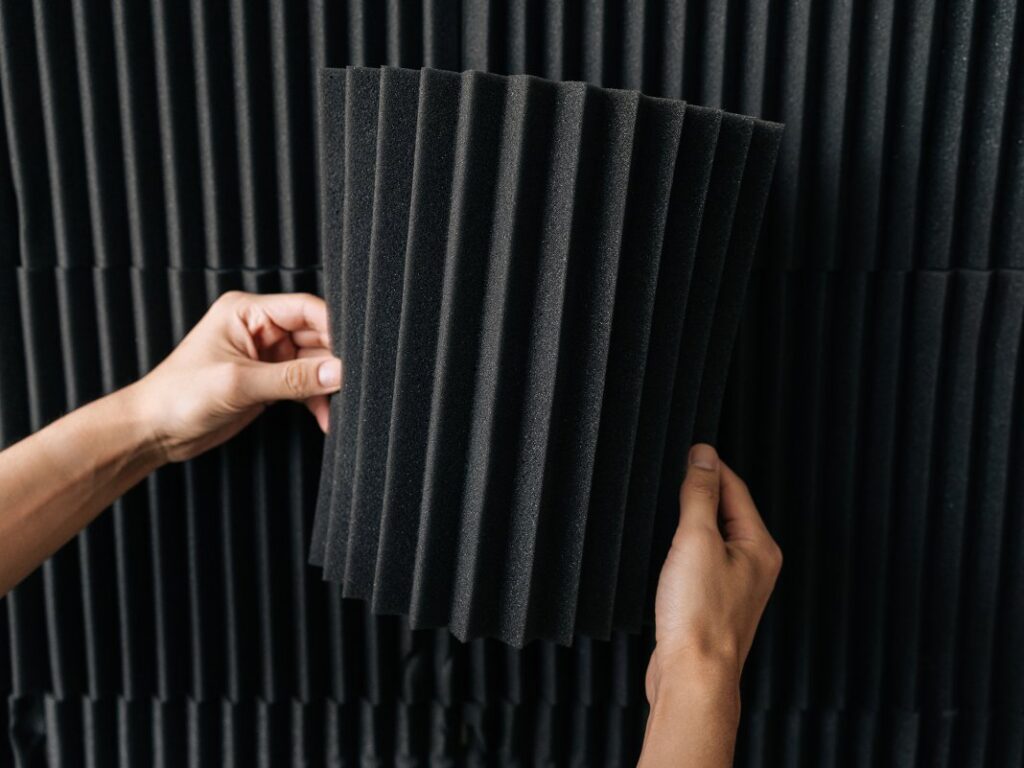
Absorbers do what they sound like: they absorb sound. Within this category there are two main types. The first is acoustic paneling. Acoustic panels are designed to catch early reflections and prevent echoes, which can make mixing particularly difficult. “That immediate delay you hear makes mixing, mastering, and production almost impossible in rooms with bare walls because you’re hearing this phased, delayed version of your track,” explains Michael. “You cannot set reverbs accurately (and) it’s really difficult to phase align drums. Just those panels alone get rid of pretty much all the meaningful slap back.”
Then there are bass traps. Like panels, these also absorb sound, but instead of delays, they’ve meant to prevent standing bass waves that can build up and throw off your perception of a track’s low end. “Bass traps start at a lower frequency than acoustic panels,” says Dave Shevyn, head of GIK Acoustics Europe.
Diffusers are a different type of acoustic treatment. Rather than sucking up sound, they scatter it, breaking up reflections and spreading the sound around. “This enables you to keep a room lively without losing the energy of those higher frequencies,” says Dave. “Great in a live room scenario or for making a small room sound larger than it actually is.”
There are also products that combine elements of both types, such as GIK Acoustics’ Amplitude panels. “What makes these unique is that they diffuse and absorb at the same time,” says Dave. “This combines elegance, diffusion and absorption into one panel or corner trap.”
Should you hire an acoustics company or do it yourself?
You’ve decided that it’s time to treat your studio space acoustically. The question that you now face: should you do it all yourself, or hire a specialist company to assist you? The answer will likely come down to how much money you can comfortably spend on the project.
At one end of the spectrum is bringing in a company to create an entirely new room for you, one that will solve acoustic problems before they even start. “If one has millions of dollars and loads of time, then the way to do it is hire professionals that really know what they’re doing,” advises Michael.
The next rung down the expense ladder is to bring in a company like GIK Acoustics, who can look at the room that you’ve got to work with and design treatment that fits the environment.
If you do decide to do the work yourself, you can either buy ready-made absorption and diffusion panels, or build them yourself. Although there are many things to keep in mind, the process is actually less daunting than it may sound. “It’s simply about improving the sound of the room,” assures Dave, “and there are lots of ways to approach it.”
How to DIY: Getting started
Before you even start putting nails in the walls, there are things you can do to make sure you’re getting the most out of your room. Avoid cuboid-type rooms and try to choose one with a rectangular shape. Next, place your mixing desk along one of the short walls. “You don’t want to be putting your setup against the longest wall,” stresses Michael. “It just introduces more problems.” Michael also recommends putting your monitors on stands.
There are other, basic ways to start treating your studio. Mixer company Mackie suggests heavy rugs, thick curtains, and even a large, fully stocked bookshelf stacked floor to ceiling as types of DIY absorbers. Of course, these are not ideal, but something is better than nothing.
Also, you shouldn’t feel like you have to do everything at once. Monitor company ADAM Audio recommends going with the best treatment that you can afford, a little at a time: “Once you have more money, you can continue adding additional acoustic panels and bass traps.”
Another piece of advice: don’t aim for total coverage. The goal is not a 100-percent dead room but a natural-sounding one. “You want to get pretty good coverage,” Michael says. “If at least 20-30 percent of the wall surface is covered with panels, they’ll take care of so many problems.”
As for where to put the panels, that will depend on your specific space. Acoustics companies like GIK Acoustics offer room designers to help with this, but a good rule of thumb is to place panels at so-called mirror points. Sit at your desk and have an assistant hold up a mirror at eye level at various places around the room. If you can see a speaker in the mirror, you need a panel on that wall. And don’t forget the ceiling!
How to DIY: Making absorption panels
There are plenty of blueprints and plans for building acoustic panels available online. While diffusers are more difficult, given the mathematics involved to properly scatter the various frequencies, absorbers are relatively easy to make – and extremely affordable.
Absorption panels generally comprise of some kind of insulation, a wooden frame to contain it, and fabric to cover it and hold the insulation in. There are different kinds of insulation that you can try, with some common types including rock mineral and glass fiber wool as well as recycled foam slabs, recycled denim and hemp or wood fibre insulation. Note that Michael, in his YouTube video on building DIY panels, cautions against rock mineral and glass fiber wool because of the health risks. If you do go with one of these, be sure and wear proper protective clothing and use a mask.
One important thing to keep in mind is the depth of the panel. ADAM Audio recommends going as deep as possible, as depth makes acoustic panels work better at low frequencies. You can also increase performance by ensuring a gap between the panels and the surface they are installed on.
You also want to make sure that your chosen fabric is not too dense. If air can pass through, so can sound waves. “They work by transferring sound energy to heat,” explains Dave of GIK Acoustics. “The gas flow resistivity of the materials is key to how these work.”
As for budget, Michael Wynne estimates that if you spend between $250 and $1000, depending on how many panels you want, “you can get your room from sounding like it’s absolutely terrible to sounding like a really nice, tight, almost dry room with a natural amount of reverberation.”
If buying panels sounds expensive, and making them is beyond your abilities, you may be tempted to tack up a bunch of egg cartons on the wall. This is not recommended.
“You could,” says Dave, “but as I used to say during the ‘myths section’ of our educational lectures, I hope you like eggs because you are going to need to eat a lot of them! But seriously, egg cartons would have a minimal effect on any sound; cardboard is absorptive. Where the whole myth originates from is foam pyramid-like products. They are shaped like this to increase the absorption surface area of the material. The shape alone is not the reason those products absorb sound.”
What about room correction software?
Room correction products, such as Audient’s ORIA Mini and IK Multimedia’s ARC Studio, can ‘listen’ to your room and help iron out sonic imperfections.
Andrew Allen, the Chief Product Officer (CPO) at Audient, explains how it works: “ORIA Mini measures what’s happening at your listening position using Sonarworks’ SoundID Reference and corrects for it, so you hear something much closer to neutral and the decisions you make hold up when the mix leaves the room. There’s also a really practical side to it: you can load profiles that mimic other systems, like a car or a phone, and check how a mix translates without getting up from the desk.”
However, room correction shouldn’t be thought of as an alternative to acoustic treatment but as an integral part of it. “We’d always recommend treating your room as best practice,” says Andrew, “but good treatment can be expensive and takes up space. Even a well-treated room has issues left over – particularly in the low end. ORIA Mini cleans up what the treatment can’t.”
Michael Wynne also recommends using room correction to address any pesky lingering bass issues: “I say use the panels, use some kind of software or hardware speaker correction like Sound ID Sonarworks or a Trinnov Nova like I’ve got, something to correct some of the bass problems in your room, and then just enjoy life.”
In conclusion, acoustic treatment is something that all musicians and music producers should consider doing. With just a little effort, you can likely achieve dramatic results. “Your room will probably allow you to hear at least 90 percent of the problems that are going to matter to listeners,” says Michael, “and that, combined with working on headphones, there’s not really going to be a whole lot holding you back.”
The post The complete guide to getting the best acoustics in your home studio appeared first on MusicTech.