Rebuilding AUTOMATIC1111 with Gradio Workflow
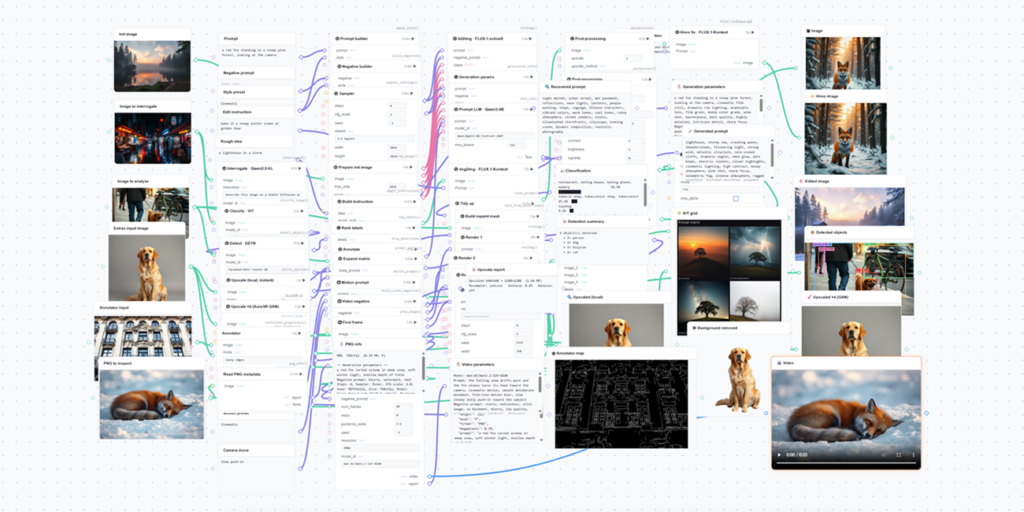
Workflow1111 is a graph of eleven media pipelines built using seventy-three nodes. It brings together state-of-the-art models for text-to-image, high-resolution fixing, image-to-image, prompt-matrix grids, visual-language model interrogation, detection-to-inpaint masks, ControlNet-style annotators, background removal, PNG Info storage, and image-to-video.
You can run any of these pipelines by signing in with your Hugging Face account or providing an access token. Once you sign in, the model calls use your own quota.
👉 Try Workflow1111, or duplicate the Space and start rewiring it for your own use case.
Let’s walk the canvas.
What’s on the canvas
All the media pipelines are built from the same four operator kinds covered in our last post and the official guide. Each node on the canvas wraps one operator, and the operator’s inputs and outputs become the ports you connect edges to. As a quick reference on our four operator kinds:
fn
is a Python function,
model
is a model called through
InferenceClient
,
space
is another Gradio Space, and
dataset
is a row from a Hub dataset.
Let’s go through the pipelines one by one.
Text-to-image
This is the core pipeline. It has the controls you’d expect from A1111’s txt2img tab: negative prompt, steps, CFG, seed, width and height, plus a
model_id
field for choosing the checkpoint. The prompt goes through a prompt-builder
fn
node first, which appends the selected style preset and cleans up the text, then into a
model
node that calls the checkpoint through Inference Providers. A post-process
fn
node writes the generation parameters into the PNG’s metadata on the way out, which is what the PNG Info pipeline reads back later.
Hi-resolution fix
In Automatic1111, hi-resolution fix first upscales the txt2img output and then runs a second denoising pass. Here it’s a two-node detour instead. The text-to-image result goes into a FLUX.1-Kontext
model
node with a refine instruction (“enhance fine detail and micro-texture, keep the composition identical”) and comes back sharper and larger.
Image-to-image
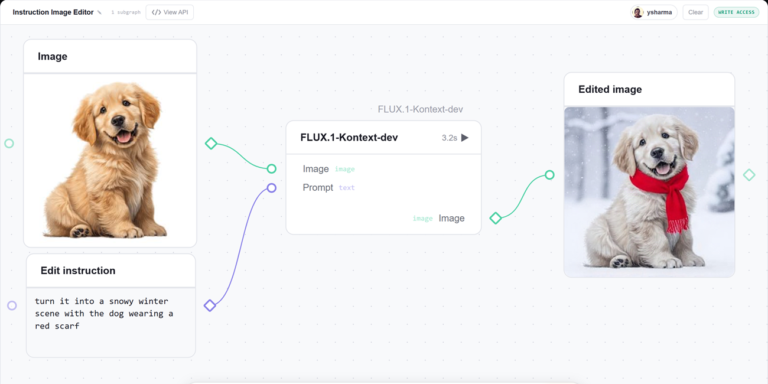
That same Kontext node doubles as the image-to-image tab. Upload an image, describe the change you want, and it returns the edited image.
Let an LLM write the prompt
Let an LLM write the prompt
Start with a rough prompt like “A lighthouse in a storm.” This pipeline sends it to a Qwen3-4B
model
node, and a small
fn
node turns the reply into a clean list of tags, capped at forty: “stormy sea, wet rocks, dramatic composition, low angle shot, volumetric lighting, ominous tone.” You can connect any diffusion model node to this output to render the image.
There’s no custom node involved, unlike in ComfyUI. In a Gradio workflow the LLM and the diffusion model are both ordinary
model
operators on the same canvas.
Read an image back into a prompt
This is like AUTOMATIC1111’s Interrogate button, with a VLM doing the interrogating instead of CLIP. Qwen2.5-VL looks at a night-market photo and writes a prompt that could have produced it. A ViT classifier node reads the same image and returns labels: restaurant 51.9%, tobacco shop 15.6%, toyshop 9.1%.
Both nodes use the same image input, so
gr.Workflow
runs them in parallel and you get both answers in roughly the time it takes to run one.
Detection to inpaint mask
AUTOMATIC1111 makes you paint an inpaint mask by hand. This pipeline generates one from a detector instead. DETR finds six objects in a street photo (three people, a dog, a bicycle, and a car), and from there the workflow splits into two branches: one draws the detected boxes on the original image, the other turns them into a mask you can feed into an inpaint pipeline downstream.
The drawing and the mask creation both happen locally with Pillow and NumPy. Only the detection call leaves the machine.
Prompt matrix
This is like AUTOMATIC1111’s prompt matrix. A base prompt, “a lone oak tree,” gets combined with four suffixes (at sunrise, in a thunderstorm, under the Milky Way, in autumn fog) by a
fn
node, and each variant goes to its own text-to-image node. A final node stitches the four results into one contact sheet.
gr.Workflow
has no loop operator, so the four text-to-image nodes sit side by side on the canvas. Since they’re at the same dependency depth they run in parallel, and all four images start generating at once.
Upscale and background removal
This is like the Extras tab in Automatic1111. There are two upscaler nodes, and they take different routes. The first is a local Lanczos resample in an
fn
node, which needs no network call and finishes as fast as Pillow can resize. The second is AuraSR ×4, and it’s the first
space
node on the canvas: it calls a Space on the Hub and treats the result like any other node output.
Background removal works the same way. BRIA RMBG-2.0 is another
space
node, so the whole model lives in its own Space and this canvas just calls it in.
Annotators
Canny, line art, sketch, luma-depth, and posterize are the preprocessors you’d normally get from the ControlNet extension in Automatic1111. Here, each one is a
fn
node written in plain NumPy, with no model behind it. On a pre-loaded example photo of a building facade, each annotator takes about half a second on CPU.
There are 36 operator nodes in the app, 32 are
fn
nodes, and 22 of those run entirely in-process without a network call. Roughly two-thirds of the canvas keeps working if you lose your connection. Since these are regular Python functions, you can also test them directly, with no canvas, server, or GPU involved.
PNG Info
AUTOMATIC1111 stores generation details in the PNG’s
parameters
text chunk, and the PNG Info tab reads them back. Workflow1111 does the same. The post-process node on the text-to-image pipeline writes the metadata, and this pipeline reads it back out, including the prompt, negative prompt, steps, CFG, seed, image size, and model.
Image-to-video
The image node that PNG Info reads from also feeds a Wan 2.2 I2V A14B node, which animates it; in the demo example a sleeping fox wakes up and starts moving. There’s no second upload box because one reference node can feed as many downstream pipelines as you need, so a single upload gets its metadata read and gets animated on the same canvas.
Running models on your own GPU
So far every model call has gone to someone else’s hardware, through Inference Providers or a Space. That’s why you can build and run something like Workflow1111 without a GPU of your own.
A
fn
node is just Python, though, so it can equally load a model locally and run it on your own GPU. FastVideo/fastvideo-fasth3-preview is a
gr.Workflow
app that does exactly that. It runs FastH3, a four-step distillation of MiniMax-H3, and generates video with a soundtrack on ZeroGPU.
The whole app comes down to one bound function:
@spaces.GPU(duration=get_duration, size=GPU_SIZE) def _generate(prompt_embeds, text_token_tags, height, width, num_frames, seed): ... gr.Workflow(bind={"generate": generate, "status": status}).launch()ZeroGPU gives the function a GPU when it needs one, then releases it when the call is done.
gr.Workflowdoesn’t need to know about any of that. It just calls the
fnnode.
This isn’t specific to Spaces either. Point
bind=to a function that loads a local checkpoint, run
.launch()on your own machine, and the Workflow1111 canvas can drive your own GPU.
Every output is an API
Every output node on the canvas becomes a REST endpoint, with no routes written by hand. Workflow1111 exposes nine of them:
/image,
/edited_image,
/generated_prompt,
/recovered_prompt,
/detected_objects,
/x_y_grid,
/upscaled_local,
/annotator_map, and
/png_info.
from gradio_client import Client client = Client("ysharma/Workflow1111", oauth_token="hf_...") image, params, hires = client.predict( "a red fox in a snowy pine forest", # Prompt "", # Negative prompt "Cinematic", # Style preset "enhance fine detail", # Hires refine instruction api_name="/image", )The same endpoints are also MCP tools. Launch with
mcp_server=True(guide) and every output node shows up as a tool an AI assistant can call. Point Claude Code, Cursor, or any MCP client at the server URL:
{ "mcpServers": { "workflow1111": { "url": "https://ysharma-workflow1111.hf.space/gradio_api/mcp/", "headers": { "X-HF-Token": "hf_..." } } } }Now an agent can generate an image, read a prompt back
Source Read original →